|
|
|
|
 Double Header 2 Double Header 2
|
|
Date Posted: Mar 1 2000
|
|
Author: Joe
|
|
|
|
|
Posting Type: Article
|
|
Category: ProCooling Projects
|
|
Page: 1 of 4
|
Article Rank: from 1 Readers
Must Log In to Rank This Article from 1 Readers
Must Log In to Rank This Article
|
|
|
|
|
Note: This is a legacy article, imported from old code. Due to this some items on the page may not function as expected. Links, Colors, and some images may not be set correctly.
|
|
|
Double Header 2 By: Joe
|
|
Project : Double Header II
|
|
|
|
Even after many felt it was never going to get posted on the site, Its here. The mother of all BP6 cooling run downs. This article will go from the testing I did, the equipment I used, and the problems I encountered, to the real deal, and end results.
|
|
|
|
Back in early March after I got the kinks and problems worked out with my Double Header I system, I went looking into SMP celerons. Not that its anything new to do some exotic cooling on celerons, but I wanted to see how far and how fast I can push these things. The holy grail for a Celeron 366 is 733Mhz, very few can achieve this, so that was my goal. I needed to find some materials and the equipment to do this. Here is the initial parts list I made up, and reasons:
|
|
|
Part
|
Qty
|
Reason
|
|
Abit BP6
|
1
|
Only Celeron SMP mobo on the market
|
|
Celeron 366 or 400
|
2
|
Went with 366 because it was available
|
|
300 Watt PS
|
2
|
one for Pelts and one for the system
|
|
75watt Pelts
|
2
|
One for each CPU - Lufkins kits from www.CoolChip.com
|
|
350+GPH pump
|
1
|
Well to move the coolant silly
|
|
Cooling blocks
|
2
|
From www.CoolChip.com
|
|
3/8" fittings
|
|
enough to get the blocks to run on 3/8" lines, and the pump to.
|
|
3/8" tubing
|
25ft
|
enough to loop from the window and back
|
|
Big Tranny Cooler
|
1
|
to cool the coolant well.
|
|
RTV Sealant
|
1
|
to seal Pelts, and other misc. areas in the setup.
|
|
Urethane Sealer
|
1
|
To seal the back of the Mobo
|
|
|
|
|
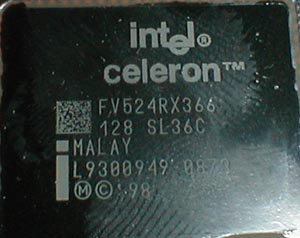
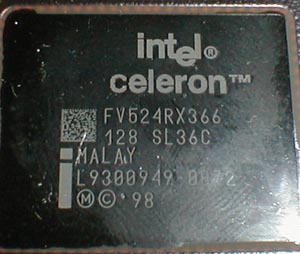
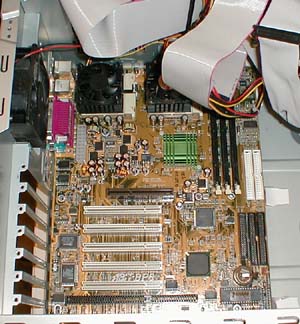
I found the motherboard and CPU through a great guy on the HardOCP FS/FT forums for about $250. When I bought it I was skeptical of the actual tolerances of the chips I was getting because they were 366's that would run at 550 @ 2.2v. I was looking for an optimal 550 @ 2.0v, but couldn't find that setup when I was looking. When I got it in I found that the chips were exactly matched, and the board was in good order. Time to get it running.
|
|
|
|
|
|
 |
|
|
|
The board came with 2 standard HSF's to keep it cool. They did an OK job at it out of the box. I could run at 550 with lil to no trouble. The Celery's were lapped and thermal grease was already applied. I couldn't get the chips to clock any higher then 550 without anymore cooling.
|
|
|
|
|
|
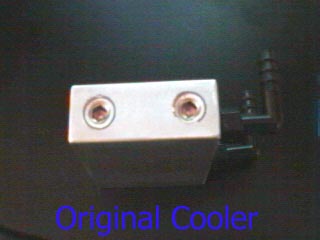
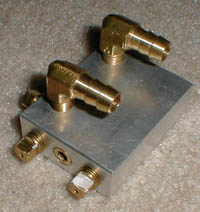
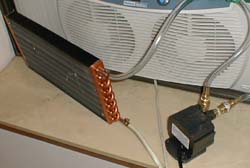
As stuff trickled in from the UPS man, and from my runs to the different shops I got the Mag Drive 350Gph pump, the tubing, the radiator, and the cooling blocks ready. It was all starting to take shape and looking like one helluva mean machine. First thing I found was the cooling blocks didn't fit the motherboard. These blocks were given to us by Scott @ Coolchip.com and were made for use on a sloket setup and not on a BP6 setup. I soon let him know about this problem and between his engineering, and testing, and mine, we both came up with a different mod on the block that will work on a BP6 fine
|
|
|
|
|
|
Redesigned
|
|
 |
|
|
|
|
Here is a list of what was all changed and modified on it to make it fit the BP6 by Coolchip.com/ProCooling:
|
|
- Drilled a 3rd core run to increase the surface area of the contact points for the coolant against the block.
- Moved the fittings onto the top of the block
- Replaced the plastic 1/4" fittings with Brass 3/8" fittings
- Fly cut the bottom to make it perfectly flat and level.
- replaced the 2 independent screw down clamps to one long clamp for both CPUs.
|
|
|
|
|
|
|
|
|
 |
|
 |
|
|
|
|
|
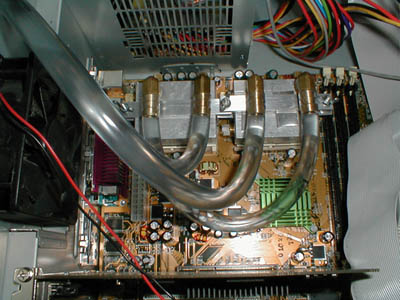
Once I got all the block problems sorted out I finally hooked it up and ran it at the highest speeds I could stable.
|
|
|
|
| Random Forum Pic |
 |
| From Thread: peltier jet impingement |
|
| | ProCooling Poll: |
| So why the hell not? |
|
I agree!
|
 67% 67%
|
|
What?
|
 17% 17%
|
|
Hell NO!
|
 0% 0%
|
|
Worst Poll Ever.
|
 17% 17%
|
Total Votes:18Please Login to Vote!
|
|


 Double Header 2
 from 1 Readers
Must Log In to Rank This Article
