|
|
|
|
 Black Ice Black Ice
|
|
Date Posted: Nov 27 2001
|
|
Author: Kevin
|
|
|
|
|
Posting Type: Article
|
|
Category: ProCooling Projects
|
|
Page: 1 of 2
|
|
Article Rank:No Rank Yet
Must Log In to Rank This Article
|
|
|
|
|
Note: This is a legacy article, imported from old code. Due to this some items on the page may not function as expected. Links, Colors, and some images may not be set correctly.
|
|
|
Black Ice By: Kevin
|
|
|
|
|
|
Preparation and Case Mods
By: Kevin 11/29/01
Ladies, gentlemen, boys, and girls: The project which I am about to present to you (at least in its current form) is the result of meticulous planning, hard work, lots of money, and time. I have many times delved into the field of super cooling, case modding, and overclocking. While about three fourths of the time I was happy with the result, there was always something left to be desired.
|
|
|
I put a lot of thought toward where I thought my future projects were headed. Would they be multi-peltier based systems with gargantuan fans blowing thousands of cubic feet per minute through a heater core? Would they be low noise systems providing an adequate, compact cooling system? What could I do that would top the best cooling projects on the Internet?
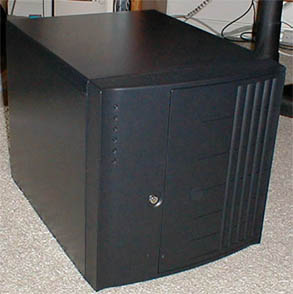
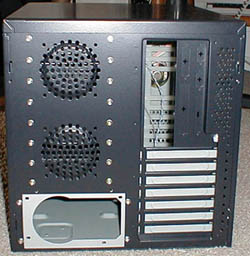
I decided that I wanted my system to be good looking, to the point where it drew major attention. I wanted it to be virtually silent, and the cooling was to be on par with the cutting edge of today's watercooling. I had owned full tower systems in the past, and I felt that no matter how modded they were, full towers always looked too lengthy. I went searching for a cube-type case and found a few. The one that I found to be the most satisfactory for my needs was the Yeong Yang YY0221B case. It was the height of a midtower, but the width of two.
|
|
 |
|
|
|
|
 |
|
|
|
I looked at this case and saw unlimited potential for modification. The stock airflow was very unsatisfactory, but it seemed like the possibilities to make it cool better than anything I had ever seen before were endless. To summarize its construction, the left side is the motherboard chamber. The right side is the chamber for everything else. There are two fan areas in the back of the component chamber and one in the front of the motherboard chamber. This isn't exactly conducive to airflow. In fact, it sucks. That was the first problem I decided to tackle.
My plan involved largely expanding the fan area in the back of the component side and the front of the motherboard chamber. Second, I wanted to put two blowholes on the top of the case, one on the left and one on the right. The plan would be that air would be sucked in through the back of the component side and the front of the motherboard side, then exhausted out the top. This would make the airflow for each chamber more or less separate. Furthermore, I would need to cut the bezel up in order to allow air to flow freely to the blowholes in the front of the motherboard chamber.
|
|
|
|
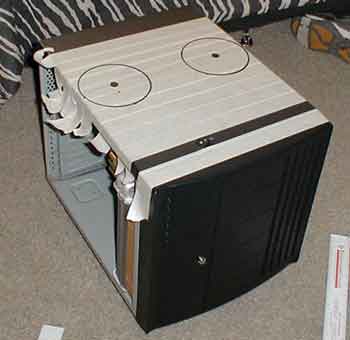
I covered the top of the case in masking tape for two reasons. The first reason is that any minor scratch on the tape would not go through to the case. The second is so I could draw the holes. I grabbed two old AOL CDs and made circles with a sharpy on the masking tape. The pic to the right is how it looked.
I added that switch on the top front near the bezel. I'll get into its function later in the article. For cutting the blowholes I used a dremel with a flex shaft and the cheap, thin cutting wheels. I went through A LOT of those wheels, but they are pretty cheap and cut well.
|
|
|
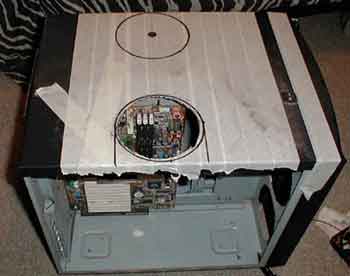
After one cut…
|
|
|
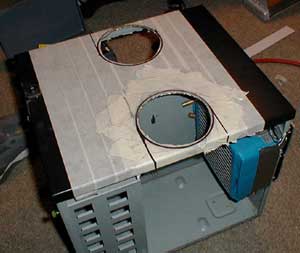
After two…
|
|
|
|
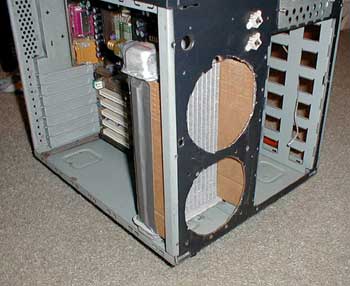
I then went to the front of the motherboard side to cut my intake holes there. If I recall correctly, there is one 92mm intake in this chamber. It was wide enough to cut a 120mm fan. In fact, it was large enough to cut TWO 120mm fans in a vertical array without interfering with the LEDs. The more the merrier! Here's the pic of my cuts in the front.
|
|
|
|
Although I'm leaving the cooling part of this article for the next article, I did have the heater core that I was going to use for these blowholes handy. Out of curiosity, I wanted to see how it would fit in that front area and how well the dual 120mm fans would match up. I got some cardboard and duct tape to simulate a shroud. I stuck the heatercore in there and it looked like this.
|
|
|
|
|
|
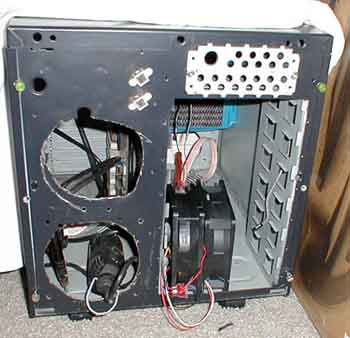
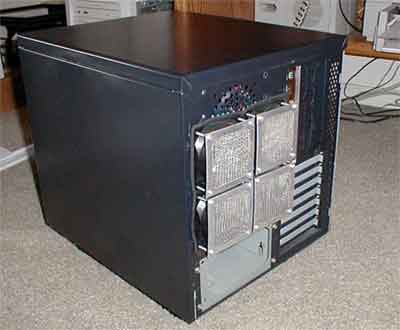
It looked to be a PERFECT fit. So at this point, I had three out of the four areas drilled. The last area to be drilled was the back of the component side. As the case comes from the manufacturer, it has a lot of drive bays in the back of the component side. It is designed as a server case so this is understandable, but I really didn't need that many. I removed all of them. I wanted to use an Overclock-Watercool Big Momma radiator here at the time. Rather than going with some high noise, high CFM, 120mm fan, I decided to cut holes for four 80mm fans in a square. To conserve space, I actually mounted the fans externally. Check out the pic to see what I mean.
|
|
|
|
| Random Forum Pic |
 |
| From Thread: Setting up Water Cooling in Pc-70 Some cool stuff inside |
|
| | ProCooling Poll: |
| So why the hell not? |
|
I agree!
|
 67% 67%
|
|
What?
|
 17% 17%
|
|
Hell NO!
|
 0% 0%
|
|
Worst Poll Ever.
|
 17% 17%
|
Total Votes:18Please Login to Vote!
|
|


 Black Ice


