|
|
|
|
 H2O Cooling a HD H2O Cooling a HD
|
|
Date Posted: Nov 5 2001
|
|
Author: Unaclocker
|
|
|
|
|
Posting Type: Article
|
|
Category: H2O and Evap
|
|
Page: 1 of 1
|
|
Article Rank:No Rank Yet
Must Log In to Rank This Article
|
|
|
|
|
Note: This is a legacy article, imported from old code. Due to this some items on the page may not function as expected. Links, Colors, and some images may not be set correctly.
|
|
|
H2O Cooling a HD By: Unaclocker
|
|
Wet Drive - H2O on your HD
|
|
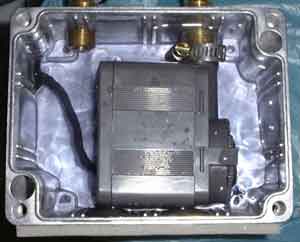
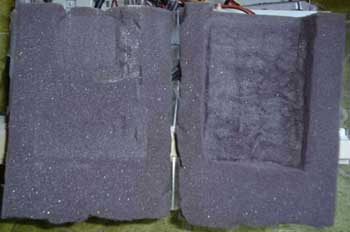
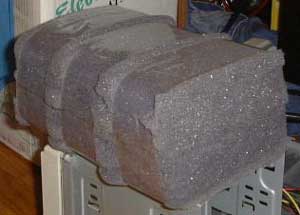
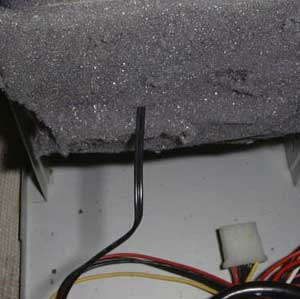
One day, about 3 months ago, I was setting up a server to run my home page off of. I gathered up my spare parts and within an hour I had myself a nice machine. It had a Pentium 200 CPU and a 1gig SCSI hard drive; just what the doctor ordered for a Linux machine. But there is an issue regarding the noise level of this box. This web server's hard drive in an old SCSI drive that has a high pitched whine that makes a Delta 44CFM 60mm fan sound tame. Amazing considering it's a 3.5" drive. But to make matters worse, I run the web server in my bedroom. So what to do? I grabbed some nice 1" thick foam I had in my closet and cut it to fit in a full height 5 1/4" drive bay. It turned out perfect when I put two pieces on top of each other. Then I cut a nice slot in the middle of the foam just big enough the hard drive to fit into. Unfortunately, I didn't get any pictures of this mess while I was making it, but I did cut it open when I was done to show the inside; hence the WaterBlock impression in the foam.
|
|
|
|
|
|
 |
|
 |
|
|
|
|
|
When I put the hard drive into the enclosure and found the noise greatly reduced, I was very pleased. A few hours later I started wondering how hot my drive was. I slid my fingers inside the foam and nearly burned them on the drive; it was flaming hot. So, I decided it might be nice to watercool this hard drive. Unfortunately, nobody really makes a hard drive waterblock right now, aside from the one in the Koolance case. I decided to try just using a normal generic CPU waterblock. The case of the hard drive is aluminum, so in theory if I cool one part of the drive, it will cool the rest of the drive as well. Unfortunately, I had to move shortly afterwards, and this project got put on the back burner.
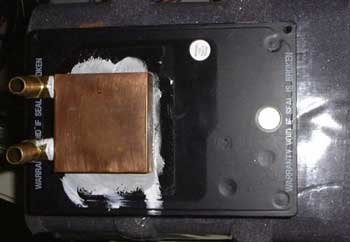
It's now 3 months later (roughly), and I'm sitting here with 4 great components that I plan to use in Project NanoCube later this year. They are the DigiDoc 5 from 2CoolTek, the Reservoir/Pump from Dtek Customs, the BlackIce radiator from Overclock-Watercool, and finally, the JMC slim 120mm fan from CaseEtc. What do ya know, toss in my generic waterblock, and I have everything I need to do this article/experiment. I've long since tossed most of the parts of this server back into my junk bin. The hard drive was still in the case, inside the foam, just begging to be watercooled. The first step was to yank the drive back out of the foam and put a nice smooth layer of heat sink paste on it. Then I placed the block on and squished out any excess paste.
|
|
|
|
Pretty simple. I considered using some zip ties to really tighten it down onto the drive, but I didn't see a need; the foam presses down so tightly that it's really not an issue. My results may have been just a little bit better if I had. Anyway, I then needed to attach one of the temp probes from the DigiDoc to the drive. I decided to put it on the front of the drive, farthest from the waterblock. There was too much circuitry on the bottom of the drive to attach it there.
|
|
|
|
|
|
|
 |
|
|
|
I fished the wire right out the front between the two layers of foam and ran it back to the DD5. I also hooked up 3 other probes. The one for the water temp is an old inline temp probe that Overclock-Watercool sent me ages ago. The other two went to the radiator; one for the incoming air temp, the other for the outgoing air temp.
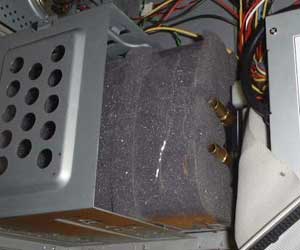
Once the drive and waterblock were stuffed back into their foam coffin, I put the assembly into the case and turned it on to allow it to get up to its full un-cooled operating temperature.
|
|
|
 |
|
|
|
|
|
|
|
|
|
|
I used the yellow tape that came with the DD5, and then decided a little packing tape over that couldn't hurt.
|
|
|
|
 |
|
|
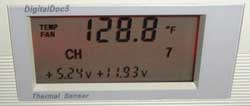
It took about 2 hours of idling before it was really hot. I decided to stop the heating process at 128f/54c.
|
|
|
 |
|
|
|
|
|
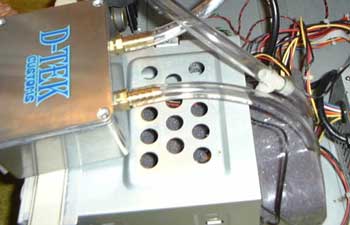
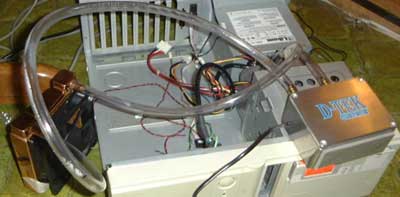
Toasty! I left it running and started setting up the watercooling. I ran the hoses to all 3 components, plugged in the fan on the radiator, and started filling the reservoir.
|
|
|
|
It turned out pretty nice. I ran into one hitch though. When I plugged the pump in, it went pop and I was left in the dark. Unfortunately, the guys at DTek made a slight mistake when they wired the pump. This goes all the way back to how they designed their reservoir. They have the cord from the pump go through a very small hole. To do that, they had to cut the plug off the end of the wire. Then they reconnected that same plug back onto the cord. They were smart and used solder to do this, but they didn't use any shrink-wrap on the wires. Instead, they used electrical tape over the solder joints and shrink-wrap over that. Either in shipping or when the shrink-wrap shrank, the soldered connections came in contact with each other, causing a nasty short. I contacted DTek about this problem and they assured me this was a one time event. They said that my reservoir had been on the shelf for a few months waiting to go to another website for review, and that it had been assembled by a former partner who is no longer with the company. He said that they now cut the wires to different lengths so that the solder joints are never side by side; each wire is then individually shrink-wrapped. So there's nothing to worry about if you're interested in buying one of these reservoir/pumps for yourself.
Anyways, I did some quick rewiring and had the pump up and running in no time. I then sat back and watched my temperatures drop. It wasn't instant, but within half an hour they were below 100f. My temps stabilized at 94f/33c. That's an amazing 34f/21c difference. Keep in mind, this drive is still wrapped in foam, no air is getting to it, and the foam is still able to keep it much quieter than it was before. These are idle temps; I don't have any machines with SCSI cards, so I couldn't give the drive a true workout.
While the drive was cooling, the water temp leaving the block stayed at 72f virtually the entire time. The air entering the radiator was 71f, and leaving it was 73f. The DigiDoc is an amazingly handy little tool. I'm in love with mine. The little alarm in it went off at around 125f while I was heating the drive to let me know about the high temperature problem. Nice feature. If you were monitoring a CPU, it may just wake you out of bed to come save the chip.
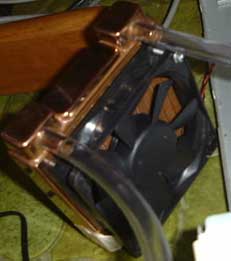
The radiator and fan performed great. I'm actually very surprised at how much air this fan moves; it's only rated for 61cfm, 26db. It did sound a bit louder than 26db when I had my ear in front of the radiator, but that's the only time I heard anything from it. I'm not sure if it was the radiator or the fan, but the holes didn't align properly, so I'll have to do some drilling at some point. For now, I just used some masking tape to hold down one corner and a screw in the opposite corner. I have no idea how many watts of heat this drive puts out, but it appears to not even be enough to raise the water temperature noticeably.
|
|
|
|
Here's a nice shot of the inside of the reservoir while the pump was running. The pump operation was extremely quiet; it'll be a welcome part to the NanoCube project. I didn't do any flow rate checking, it's a Rio 400 pump, but it seems to have decent flow.
|
|
|
|
|
|
Just to make this a well rounded article, I removed the drive from the foam and took the waterblock off. I set the drive up to run out in the open to see what kind of temperature it would run at. After an hour, the temps had stabilized at 91f. About what you'd expect from the average hard drive.
I used vinyl hose in this project because my silicone hose is reserved for NanoCube and I didn't want to cut the good stuff at all since I only have 4 feet of it to work with. It's just too expensive to use in this kind of temporary experiment. I hope you found this article informative. Watercooling a hard drive turns out to be a very viable option even if you only use a small waterblock. This is great for people who want to have a fast drive but can't stand the noise. Now you know you can just wrap the hard drive in foam and watercool it. If I had to guess, I'd say I shaved 10db off the drive with the foam. It was a major difference.
Once again, I'd like to wholeheartedly thank CaseEtc, 2CoolTek,DTekCustoms, and Overclock-Watercool for their wonderful products which made this experiment possible
|
|
If you have any comments or Questions please email me at UnaClocker@ProCooling.com
|
|
|
|
| Random Forum Pic |
 |
| From Thread: Planning to build a new radiator |
|
| | ProCooling Poll: |
| So why the hell not? |
|
I agree!
|
 67% 67%
|
|
What?
|
 17% 17%
|
|
Hell NO!
|
 0% 0%
|
|
Worst Poll Ever.
|
 17% 17%
|
Total Votes:18Please Login to Vote!
|
|


 H2O Cooling a HD


