|
|
|
|
 Una's A7V VRMAir duct mod Una's A7V VRMAir duct mod
|
|
Date Posted: Dec 29 2000
|
|
Author: Unaclocker
|
|
|
|
|
Posting Type: Article
|
|
Category: Air and Heat Pipes
|
|
Page: 1 of 1
|
|
Article Rank:No Rank Yet
Must Log In to Rank This Article
|
|
|
|
|
Note: This is a legacy article, imported from old code. Due to this some items on the page may not function as expected. Links, Colors, and some images may not be set correctly.
|
|
|
Una's A7V VRMAir duct mod By: Unaclocker
|
|
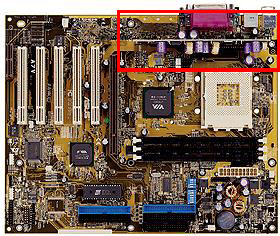
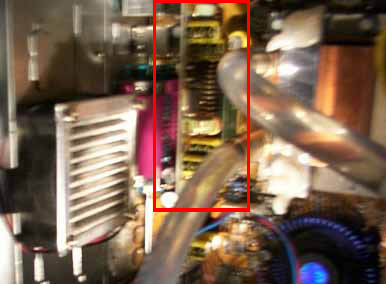
Here's the problem, I've got an Asus A7V, modded to give me more voltage, and I'm watercooling. The mod gives me more voltage, but it stresses the voltage regulators a lot more than a normal CPU would. The watercooling takes away the fan that is normally blowing on the voltage regulators - the CPU fan. So I felt that I should do something to protect the voltage regulators, if not to improve stability, at least to prolong their life. Well, let's see a picture of the situation before I started, with the fan already in place.
|
|
|
|
|
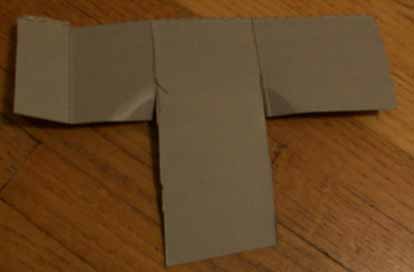
Yeah, it's a little blurry, my camera really wasn't meant to take this kind of picture. Anyway. On the left side of this picture you'll see the fan, with a filter on it, and below that (or to the right of it in the picture) you'll see the voltage regulator daughter board. What I needed was a way to direct the air down and over the voltage regulators. I placed a thermistor on the transistors on the VR board, and found one of them at 145f, and many others at 100+. So I found a box made of a suitable poster board like material, and cut it up.
|
|
 |
|
|
|
|
The Problem ( But Dig the Blorbage :)
|
|
 |
|
|
|
|
The incredibly space age material used for this duct
|
|
|
|
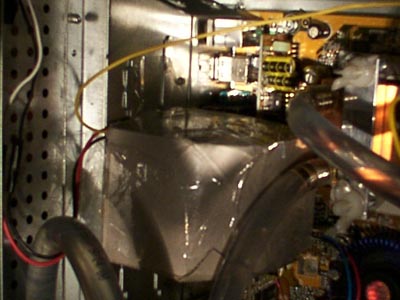
Here's what I came up with, fold the two sides down, and bend the lower part downward, and we end up with a great duct, that looks like the pic below.
|
|
|
|
|
|
|
|
Ok, here you see how it works, it ended up with a nice gentle arc to prevent causing too much back pressure, which seriously decreases airflow. I used packing tape to hold it all together, and to hold it onto the case. The best part is, I could take my cardboard "prototype" and use it as a template to make a sheet metal version of this duct, if I were so inclined.
The results? That same 145f transistor is now at 95f. Granted, this isn't as accurate of a reading as Joe's Temp gun, but the temps are pretty good, I used the same temp probe both times. The fan shown in the first picture is not the one I ended up using, I ended up using the YS Tech fan from my old FOP32 heat sink, I wired the fan into my fan bus, but still ran the rpm wire back to the motherboard so that I could keep track of the speed of the fan.
Also, the hole for the fan, I put that in in Project Little Stealth.
|
|
|
|
|
That about wraps this article up, If you have Questions please post them on the ProCooling Forums (recommended), or Email UnaClocker directly.
|
|
|
|
| Random Forum Pic |
 |
| From Thread: About to refurbish 18 month old loop & New PC on the horizon |
|
| | ProCooling Poll: |
| So why the hell not? |
|
I agree!
|
 67% 67%
|
|
What?
|
 17% 17%
|
|
Hell NO!
|
 0% 0%
|
|
Worst Poll Ever.
|
 17% 17%
|
Total Votes:18Please Login to Vote!
|
|


 Una's A7V VRMAir duct mod


