|
|
|
|
 Black Ice - Silent Frost Update Black Ice - Silent Frost Update
|
|
Date Posted: Nov 3 2002
|
|
Author: Kevin
|
|
|
|
|
Posting Type: Article
|
|
Category: ProCooling Projects
|
|
Page: 1 of 2
|
|
Article Rank:No Rank Yet
Must Log In to Rank This Article
|
|
|
|
|
Note: This is a legacy article, imported from old code. Due to this some items on the page may not function as expected. Links, Colors, and some images may not be set correctly.
|
|
|
Black Ice - Silent Frost Update By: Kevin
|
|
|
|
Project: Black Ice - Silent Frost Update By Kevin 11/03/02
|
|
|
|
|
It has been a long time since I last pulled the YY cube case out of its corner. Dust was caked in the fan grills, and it had a pathetic, unfinished look. I modded the case before I went to college at San Diego over a year ago, never having time to finish it up during school. Even with my busy schedule of full-time summer work and maintaining a social life, I knew this cooling system had to be finished as the untapped potential was just staring me in the face.
|
|
|
|
|
|
Initially, "Black Ice" was designed to be a sleek looking system, nearly hiding its water-based internals. It was to be quiet, yet still cool with power. After examining many different cases, I chose the YY cube case because its dual chamber design let me play with new types of cooling system designs. Furthermore, I found it much more stylish than a full tower.
I'm embarking on Part II of "Black Ice." However, the title has been changed because with so many things named "Black Ice" these days, I'd look downright silly coming out with an article sporting that name. Part I of this article had little to nothing about cooling written in it. It was simply a case modding article, describing how one could turn a standard looking YY cube case into a unique, flashy piece of work. It included the nitty gritty work of cutting holes for radiators, windows, and fans. If you haven't read it yet, I highly suggets taking a look before proceeding with this article to bring you up to speed. Relating to Part I, this article assumes the previously cut case and mainly details putting the actual cooling system into the case and setting it up.
|
|
|
|
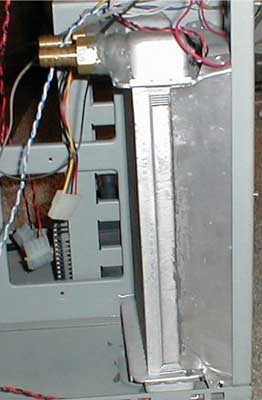
As of now, this system lacks any sort of peltier device, but I designed it with peltiers in mind. The ultimate goal is a quiet PC with stellar cooling in a good-looking package. Before the actual watercooling part of the system is delved into, let's examine case cooling and ventilation. The YY cube, as a stock case, has horrendous cooling capabilities. Cutting it up, though, reveals many great ways to direct airflow. I chose a method of cooling that treats each chamber of the case (motherboard and component) as a separate entity. For example, the motherboard chamber has two 120mm fan intakes and one 120mm fan exhaust. The component chamber has four 80mm fans for intake and one 120mm fan for exhaust. Having a bit more intake than exhaust helps to keep dust out of the system, as there is more internal pressure.
Referring to the motherboard chamber, the two 120mm fans sit behind the fan grills on the front bezel. These two fans (and all 120mm fans in this project) are JMC 61 cfm fans that only put out 26db of noise. These two intake fans actually propel outside air through a heatercore (which I will speak about later). This air is then exhausted on the top of the case through another JMC 120mm fan, running at a mere 5v.
|
|
|
|
|
 |
|
|
In the second picture, it is visible that I had already started attaching hoses throughout the system. Furthermore, the cold cathode tube is right behind the fan. The electrical stuff for the cold cathode light is right above the heatercore. Lastly, take a look at how the edge of the case seems to be rather torn up. This is because I initially cut the exhaust hole a bit too close to the side, so the edges needed to be trimmed in order for the side door to swing shut. This isn't too much of a big deal now because when the door is shut, it covers that blemish.
|
|
|
|
|
|
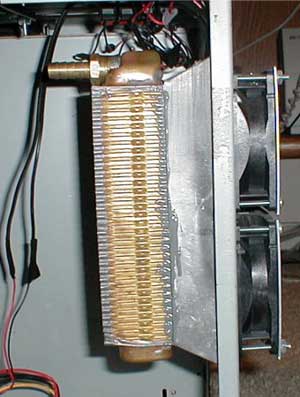
On the component side of the chamber, the fans are mounted externally to leave more room, and they are all 80mm Panaflo L1As. These fans each put out a measly 21db of noise and 24 cfm of airflow. When joined together in a square, the airflow is nearly 100 cfm. This 100 cfm goes through a heatercore and then is exhausted out the top by a JMC 120mm fan, once again running at 5v. Take a look at the picture to clarify what's going on.
|
|
|
|
While it may seem that I have much more air intake than exhaust, one must realize that the intake is blocked by heatercores so the CFM coming in is greatly reduced. You may or may not have noticed that I've mentioned heatercores in two different places in this case. That's because I was able to squeeze in two of them. The one behind the dual 120mm fans in the front of the motherboard chamber is a GEO heatercore bought from www.heatercore4u.com. It initially had 5/8" barbs, but I sawed them off and put ½" barbs there instead. The heatercore in the back of the component chamber is a "Big Momma" still leftover from the days when Overclock-Watercool was a legitimate company. It only has 3/8" barbs.
|
|
|
|
|
|
|
|
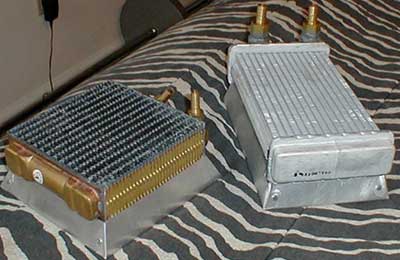
It is obvious that these fans don't fit perfectly against the heatercores. To rectify this problem, I built metal shrouds to direct the airflow into the heatercores. To do this, I first made model shrouds of an old K7S5A motherboard box. Take a look at the models.
I took my model shrouds to my uncle's house where he helped me bend sheet metal into metal shrouds. Check out the pics. Once I had these shrouds made, I mounted them in the case and JB welded the heatercores to their respective shroud. Below is a pic of the final product:
|
|
|
|
|
In order to make filling the system easy, I added a fillpoint to the top of the motherboard chamber, squeezed in between the 120mm exhaust fan, the wiring for the neon light, and the heatecore. This isn't a reservoir like many systems have. Instead, it is just a tube leading to the pump. The fillpoint has a wide diameter to keep filling the system as spill-free as possible.
|
|
 |
|
|
|
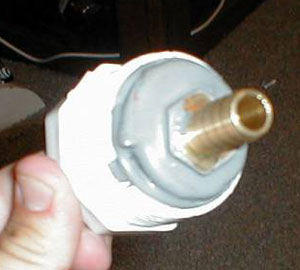
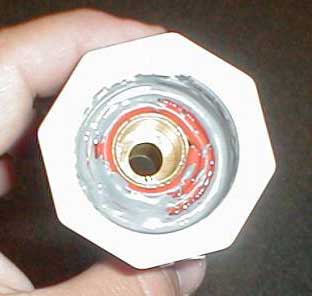
In case you were not aware, the fillpoint is the white thing on top of the case.
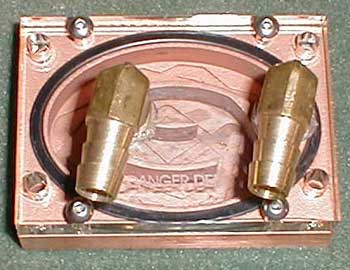
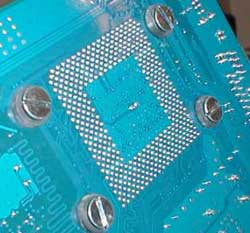
I chose the Dangerden Maze3 waterblock for this system. It is one of the highest performing, if not the single highest performing block, on the market right now. We are at a time when most of the high-end blocks perform similarly and with most companies, any one of their waterblocks will suit you well. However, the Maze3 looks so damn cool…
|
|
|
|
|
|
The fillpoint is basically just white, threaded PVC pipe with a threaded plug. The PVC was quite wide and in order to reduce it to the 1/2" barb I had, I tightly wrapped thin wall silicone house around the threaded part of the barb. I then inserted that into the bottom of the PVC fillpoint. To keep the fillpoint solid and leak free, I coated both sides of it with JB weld. Check the pictures for more clarification.
|
|
|
 |
|
|
|
|
|
|
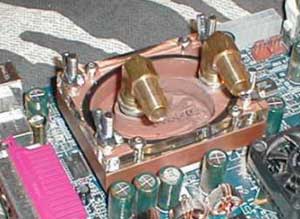
Note the 90 degree hose barbs. Initially, Dennis had made this block esspecially for me (Thanks, Dennis!) so it would fit under the power supply in my Chilli Pro case. However, I got frustrated with that project and put it on the back burner. When this project came around, I decided that I might as well use the Maze3 that Dennis made me. The 90 degree barbs actually turned out to be a huge help for me as you will see later in the article.
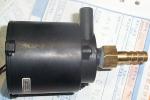
For my pump, I chose the oh-so-reliable Eheim 1250. It better be reliable because it is going to be on 24/7! I looked into relay options and wiring the pump directly to the power supply. While these are fancy and make it so only one plug needs to be inserted into the wall to
|
|
|
power both the computer and the pump, they entail the pump constanly shutting on and off. These pumps were designed for constant operation and switching them on and off may dent their longevity. Actually, wiring a pump to the power supply keeps the pump going constantly, even when the PC is turned off. Thus, I could have saved myself from plugging in two cables by doing that mod, but… I was too lazy. The component side of the motherboard has a total of 6 5 ¼" bays. I mounted the pump on the bottom bay and it takes up the lower 3 bays. I personally have no use for 6 bays. Just a DVD and CDRW drive for me. The pump was mounted on a piece of adhesive foam to quell any vibrations that may try and add noise to the system.
Now that I have gone through every component in this cooling system, let's see how it all works out together. Looking into my case may prove daunting due to the complexity of everything confined to such a small space, but this diagram breaks it down easily.
|
|
 |
|
As you can see from this picture, the system is actually quite basic. The only things that mildly diverge from the normal ranks of watercooling would be the added fillpoint and the second heatercore.
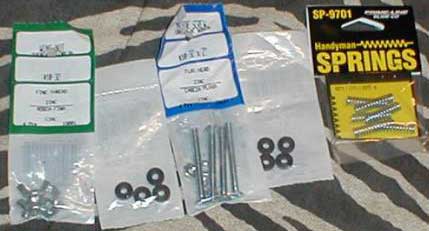
I hit a mild snag toward the end of my endeavor. I had lost the Dangerden mounting hardware Dennis sent me a while back. At first I fretted. However, a quick late night trip to Home Depot brought upon me the following items:
|
|
|
|
|
|
The screws I bought were not quite long enough. Thus, I was never able to use the springs. However, the rubber washers and wingnut screws worked out very well! In fact, because the screws are shorter, the block has less clutter around it and looks even sexier.
|
|
|
|
|
| Random Forum Pic |
 |
| From Thread: Post pictures of your homebuilt blocks here! |
|
| | ProCooling Poll: |
| So why the hell not? |
|
I agree!
|
 67% 67%
|
|
What?
|
 17% 17%
|
|
Hell NO!
|
 0% 0%
|
|
Worst Poll Ever.
|
 17% 17%
|
Total Votes:18Please Login to Vote!
|
|