|
|
|
|
 Athlon Super Cool Athlon Super Cool
|
|
Date Posted: Jun 4 2000
|
|
Author: Unaclocker
|
|
|
|
|
Posting Type: Article
|
|
Category: ProCooling Projects
|
|
Page: 1 of 1
|
|
Article Rank:No Rank Yet
Must Log In to Rank This Article
|
|
|
|
|
Note: This is a legacy article, imported from old code. Due to this some items on the page may not function as expected. Links, Colors, and some images may not be set correctly.
|
|
|
Athlon Super Cool By: Unaclocker
|
|
Una's Athlon H2O and Pelt Cooling Adventure
|
|
|
Lets get this thing started right! - With a rant
|
|
First of all, I'd like to start with a little ranting. This article would have been done over a month ago, if I had done my film the way I normally do it. Which is to take a bunch of photos, run down to Wal-Mart, have them developed in an hour, drive over to my mother's house, have her husband scan them on his nice HP scanner, and later that day, I have my pictures, and last time I did that (for my watercooling article), they came out looking better on the computer than the paper photo's he scanned. This time, I decided to go with a more modern way. There's this site called Ofoto, and when you sign up there, they mail you all kinds of nice propaganda, and a film mailer, it's a plastic envelope that you insert a roll of film into, and mail back to them. What really got my attention was that they develop the film, and scan the negatives and place "high resolution" images online for FREE. They also mail the negatives back, and will print photo's that you select on Kodak film, and mail them to you for free (first mailing is free only). I was pretty impressed, my mother's husband wondered how they could do that for free, but hey, it's normal for businesses to not make money on the net. heh, so April 24th, I went ahead and dropped this very important roll of film into the mail. I kind of snickered because I knew that if it worked out nicely, I'd continue to send them rolls of film, and it'd save me the cost of Wal-Mart's developing, and the hassle of driving out of town to have them scanned. Well, Around May 2nd, I hadn't yet received confirmation from Ofoto that my film had arrived.. (Mail from Washington State to San Francisco, California only takes 2-3 days), and they just assured me that it hadn't arrived yet, and that they had no effect on the mail system. I think I fired off another email complaining a couple days later, and on May 7th, they finally got the film (or realized they had it). 3 days later, it was done being developed. I wasn't too pleased with that, 3 days to develop the film, they could have taken it to wal-mart a dozen times in 3 days.. But they said that they had received a lot of film in response to their advertising, and were working to expand their capacity so that delays wouldn't happen anymore. Ok, little did I know, that expansion meant that my film would sit there, for the next 3 weeks while they did that, and what should have taken about an hour to do, took 3 weeks instead. So my negatives sat at their office, while they "expanded capacity" or whatever they did. I sent off almost daily queries and complaints to their tech support, I even made phone calls, and all I could get were generic responses. I got a 4-5 more days around May 15th, and another one May 21st.. heh, I also threatened to drive down to San Francisco (at their expense) and help them scan my film.. I think that's finally what did it, because on the morning that I had promised to arrive, my photos were online. Unfortunately, the quality is crap, but at least I have something to work with, the photographs were anything but high resolution, about 500x600ish and saved at medium quality in jpg format. I dunno about you, but if I have to have my pictures in .jpg, I'd like 1600x1200 and high quality, not medium.. But I'd really just prefer .tif 1024x768 or so..
Anyway, enough with my ranting, here's my article covering how to: 1) Run 2 peltiers on an Athlon with a Be-Cooling water block, and 2) How to insulate them against condensation.
|
|
|
Onto the Cooler, Cold Plate and Insulation
|
|
|
|
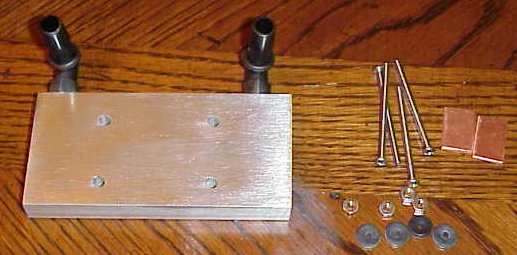
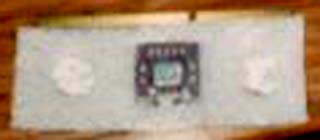
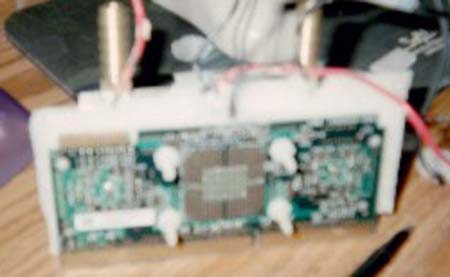
Ok, Here's where I started, I've got a water block that screws through that Athlon PCB to hold the block to the CPU, this is great for normal uses, and would probably be great for 1 Peltier, or even stacked peltiers, but I wanted to run my peltier's side by side, so I had to do something differently (note, I replaced those dangerous plastic elbows with brass straight pieces).
|
|
|
|
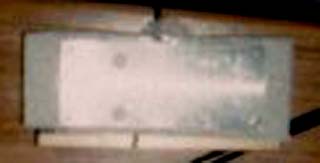
Here's my solution- A cold plate (1/4" aluminum) roughly 40x110mm. It looks badly cut in the photo, trust me, it's square in real life. I had it made in a machine shop, I wanted it to fit the peltiers, cover the cache, and be able to have 4 holes drilled at the ends. The 4 holes in the middle are for holding the coldplate to the PCB. They're countersunk so that the screws will not interfere with the peltiers sitting directly above them. I drilled 4 holes at the ends and 4 holes at the ends of my waterblock, making sure to be outside the waterjacket, so that I could screw the waterblock tight against the peltiers.
|
|
|
|
|
Coldplate with Pelts
|
|
 |
|
|
|
|
Modified Coldplate
|
|
 |
|
|
For the rest of this article I apologize for the quality of the pic's
|
|
|
|
Ok, so now we have the basic theory of how I'm doing all this. Now onto the insulation- I decided to go with readily available motherboard foam. The closed cell stuff that comes with cheap motherboards. Now this is where I've seen a lot of people go wrong, I've even seen it done on websites claiming to know what they're doing. Open cell foam will NOT keep out condensation, if anything, it'll act like a sponge to make it seem ok for awhile and then all of a sudden, you've got a drenched CPU. The best way to make sure your foam is closed cell is to place it against your lips, and blow through it. If you CAN blow through it, it's the WRONG kind. That there is open cell, toss it in your water reservoir, makes a great sound dampener for your pump :). Now if you can kind of blow through it, it's still not good enough. You need to not be able to blow through it at ALL. You can get closed cell foam at hobby shops too, but I'm cheap, so I went to the local computer store and asked for a few sheets, told them it was for a science experiment.
And here we have the first layer of insulation, turns out this stuff holds my nickels on top of the cache really nicely, you can sort of make out the heatsink compound coated nickels over my cache. I tried to put 2 layers of foam here, but it was impossible to compress it enough, so I just went with one, this is where craft foam in different sizes would have come in handy. Now it's time to attach the coldplate.
|
|
|
|
Here's the coldplate, I even have foam around it at this point, I just cut it to the size of the CPU PCB, and then cut a square the size of the cold plate out of the middle, and slipped it down over the coldplate, I think it took 2 or 3 layers. Probably 2. You can see the wire from my Asus P2T temp probe sticking out of the top, it's taped at the base of the CPU core, I meant to get a shot of that, but I forgot. Another important insulation item, the screws. I used nylon screws, because they don't conduct heat or cold. So the ends sticking out the back of the PCB aren't as cold as the coldplate, that would cause me to have to insulate them too, which is just a hassle. Then there's the screws that hold the waterblock to the coldplate (and sandwiches the peltiers), those being nylon helps prevent the hot side (waterblock) from warming the cold side.
|
|
|
|
|
First Layer of Foam w/ Nickels over cache
|
|
 |
|
|
Cold Plate Attached, and Insulated
|
|
 |
|
|
|
|
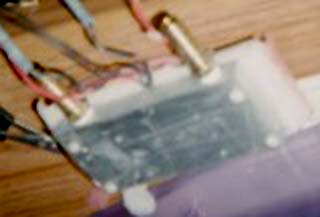
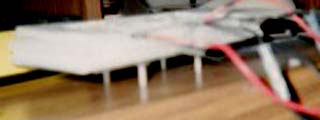
And here are my 2 50watt peltiers, sitting side by side, cold side down, with insulation around them. Only thing left is to attach the waterblock.
|
|
|
|
|
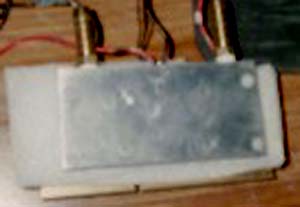
Side View
|
|
 |
|
|
|
|
|
|
The 2 Pelts encased in Foam
|
|
|
 |
|
|
|
|
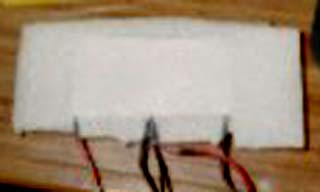
Heh, These are probably the best two shots out of the lot. Anyway, here we have the waterblock screwed on, sandwiching the peltiers, and the foam to form a nice airtight seal, and you can see the 4 nylon screws at the outside corners that I used. You can kind of see the 4 inside holes that were originally used. Now it's time to deal with the back of the CPU.
|
|
|
|
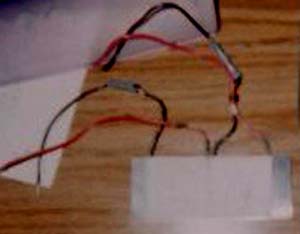
Here's the final problem. The back of this CPU is going to get very very cold, I need to do something to prevent it from getting condensation all over it.
|
|
|
|
Back of the rig
|
|
 |
|
|
|
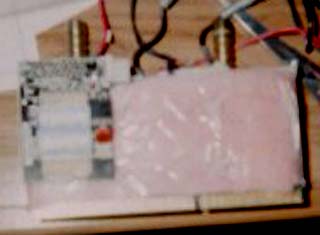
And here it what I did. Several layers of foam, and then I wrapped it up like a mummy with packing tape. Is there a better way? Yes. But this was good enough for me, and I'm not aiming for -20+c or something wild like that. I was aiming for 1-8c.
|
|
|
|
|
The Finished CPU with GFD
|
|
 |
|
|
|
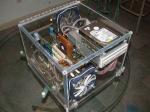
Here it is completely done, and the maximizer still fits. WooHoo.. So how did it all work? What was I able to do with my CPU. Well, that's the sad part, the peltier's I got, I got used, from someone in a trade. Well, I don't know if it just wasn't enough wattage at 12v (50watts at 15v, less at 12v).. Or maybe one or both of them had been overworked at some point and some of the couples had died. Whatever it was, it was unable to keep up with my CPU, even clocked down to it's default speed of 650MHz, the temperature shot up to 100+f..Kind of depressing after I had put so much work, and hope into it, but I do plan to try again. This time I will get a pair of 130watt peltiers from RadioShack. Even at 12v, they should have no problem freezing this CPU, though I may have to drill some more water passages into the waterblock to keep it cool, we shall see
|
|
|
|
|
|
That about wraps this article up, If you have Questions please post them on the ProCooling Forums (recommended), or Email Unaclocker directly. Thanks for your time, and hope you liked the article! Look for alot more goodness coming from Una Soon!
|
|
|
|
Home
|
|
|
|
|
|
| Random Forum Pic |
 |
| From Thread: custom-built clear case (its finally DONE!!!) |
|
| | ProCooling Poll: |
| So why the hell not? |
|
I agree!
|
 67% 67%
|
|
What?
|
 17% 17%
|
|
Hell NO!
|
 0% 0%
|
|
Worst Poll Ever.
|
 17% 17%
|
Total Votes:18Please Login to Vote!
|
|